Showing posts with label Beach Shack Inspiration. Show all posts

Wednesday, 11 March 2015

Garage Sale Virgin

Over the weekend I went to my very first garage sale. It was totally impromptu but it was at a house that I've long admired around the corner from me. I'll admit that I went mostly to take a sneaky peak at the property BUT, whilst I didn't get to see much of the house (the sale was in the garage funnily enough) I did find some awesome treasure amongst the trash (all for the grand total of $12).


Most of it found it's way to my shack. Not because it wasn't lovely stuff but simply because it was all true to the style that I've decorated the shack (natural, earthy and vintage).

The day following the garage sale I went to the beach house and couldn't wait to find homes for my haul.


This garage sale business is addictive stuff. I'm going to have to check the paper this weekend and hope that there's another treasure trove for me to raid. Fingers crossed!

Thursday, 14 August 2014

Am I A Hippy Now?

Ahhh, I do love a sunny Winters day and lately Launceston has been getting plenty of them, today being no exception. Lovely.

Anyhoo, today I was reflecting on what I've been doing of late and whether any of it is blog worthy. I realised that for some reason I'm clearly going through an more extreme phase in my 'living more simply" phase (if it is a phase!?) I've been activating legumes, gardening, sprouting vegetables for the Summer garden, not washing my hair with shampoo and the big one....killing, plucking and butchering roosters for my freezer. Yes, I think I am officially a hippy!

When I say that or even think about what that means, I feel slightly horrified. I get images of unwashed, cheesecloth wearing, patchouli smelling, dreadlocked people from my childhood (I grew up in the bush surrounded by these types but never considered myself one.) I was slightly reassured recently when I asked my friend if she thought that I had turned into a hippy and she promptly replied "I don't think a hippy would have an oven like that" pointing at my very luxurious stainless steel, 900mm wide Smeg. Thank you Verity, you made my day!

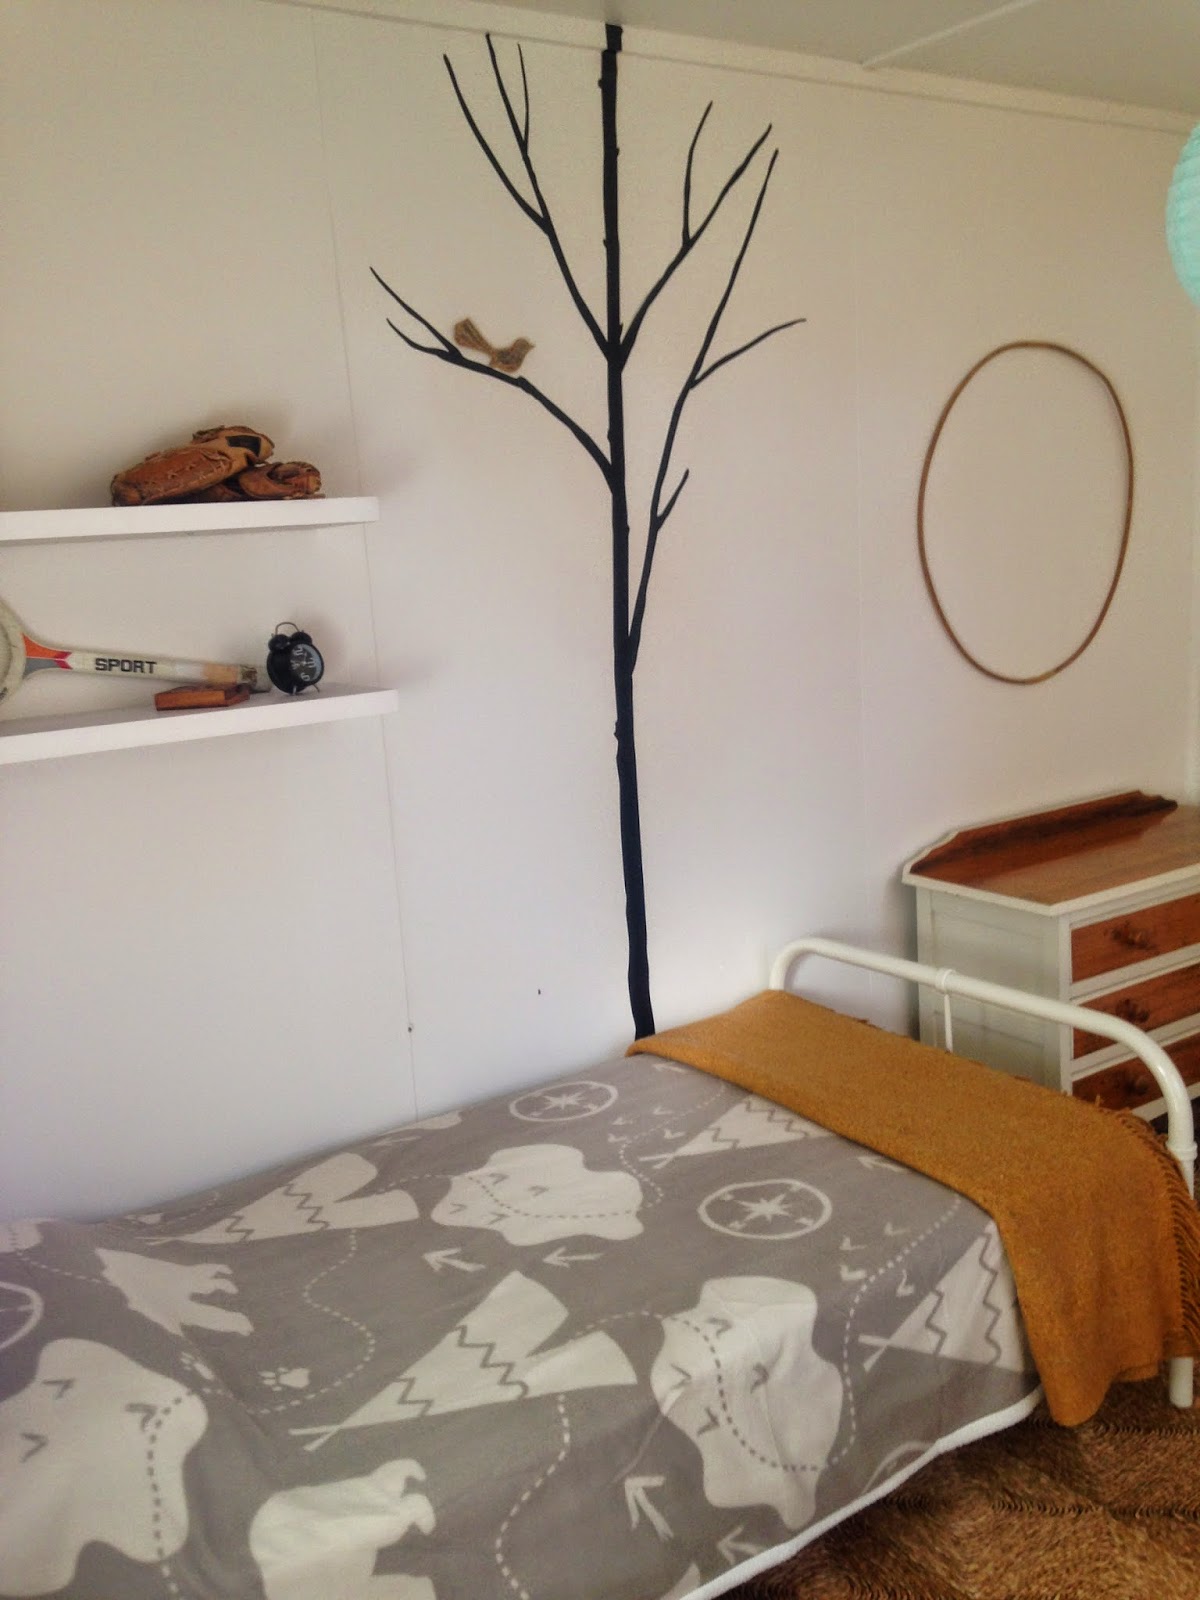
With our renovation at a bit of a standstill and my unpaid maternity leave keeping us a bit more budget conscious, I find that I don't have as much decoration stuff to show off any more but I still enjoy rearranging what I already have. Last weekend we went to the beach shack and I found myself Spring cleaning and moving around all the rooms as I went along. I don't know how many times I have redone Ewan's room now but it's been done again.


It's amazing how a little cleaning and rearranging can be as satisfying as buying a lot of new things to decorate with. This room is much the same as it was before however it feels new with only a few items (from other rooms) introduced and the display items rearranged. That's the cheapest renovation I've ever done!

Tuesday, 8 July 2014

New Blankets for Winter

It's been busy, busy, busy in our household of late. Nothing significant, just day to day stuff but my list of "to do" things isn't getting any smaller (unfortunately).

Over the weekend we went down to our shack for a bit of a break. I don't feel like we get there nearly enough now days but it's always a breath of fresh air (literally) when we do.

It's Winter here in Tassie and before we left for the shack, I popped into Kmart to get a few new blankets for the kids beds. Not the usual place that I'd go for linen however I'd seen some cute blankets in their catalogue and they were only $18 each!


Soft coral fleece on the top side and faux wool on the other, they make the beds look nice and cosy. They also have a lovely little camping theme which is sort of appropriate since we're at the shack (although the shack is a whole lot nicer than camping in a tent!!)


The beach in Winter has a special sort of feeling about it and we had a really peaceful break. However, it was back to the madness of the daily grind again Monday but feeling rejuvenated at least.

Wednesday, 24 April 2013

Kiddie Bedroom at the Beach Shack

The beach shack has been mostly done for ages but there was one room that I hadn't done anything fun with yet. It's the "kiddie bedroom" and it's located next to Ewan's bedroom. It's a room which I had always thought would be good for Ewan to use as a playroom but also house a few beds for when others stay. 

I'd asked around my family to see if anyone had spare old bunk beds but no one had any available at the time. After nearly a year, I got sick of waiting and scouring Gumtree (the free classifieds) so I went out and purchased some new bed frames which were the start to the kiddie bedroom. They're not bunk beds but I'm glad I didn't go with bunks in the end as the twin beds look great and don't take up too much room (well not as much as I thought they would).

The beds were $99 each from a shop called Fantastic furniture and remind me of old hospital beds. They're very sweet and very "vogue". I've noticed similar styles in all the home-wares magazines of late. Next I used Gumtree to find some second hand mattresses and the retro bedside drawers was a $10 purchase from the Longford Tip Shop. I had planned on re painting them but the yellow goes really well with the room colour theme (the whole houses' colour theme for that matter) so they're going to stay yellow for now.

To style the room, I made some new cushions from left over Cloth fabric I had from the cushions in the lounge room. That same day, when I was having a sewing frenzy, I also made the bunting out of other fabric scraps. 

The bedding is only cheap white sheets and some large throw rugs from Waverley Woollen mills which are a local business in Launceston, Tasmania.


This photo was taken by a very talented friend of ours, Shaun. The frame, an old one I have from Ikea.


The walls are painted white with the left over paint from the rest of the house (Dulux Natural White) and the flooring is seagrass carpet which I have laid through most of the lower level of the house (over the concrete).

Overall I'm really happy with how it's come up. It's simple like the rest of the house as it's a beach shack and doesn't need to be too over the top styled. On the other side of the room there is a little set of kiddie table and chairs as well as an old TV so it's perfect for Ewan to lounge around in, do drawings and the like. I think the only thing it's missing is a bean bag for in front of the TV. Finding a pattern to make my own bean bag is on my to do list.

I decided to give the guest bedroom a little extra va-voom while I was in decorating mode. Using the pom pom garland that I made a few months ago, I hung it above the bed. The room was a bit bare before but adding this one feature has made all the difference. To see a pic of it before, you can go to the link here.


The beach shack interior is now complete, no doubt I'll make little changes as I feel like it but for the most part, it's done. Yay! Don't worry, I still have the bungalow to turn into "something", I want to do an outdoor living room and the back deck needs a make over so there will still be blogs about the shack. For now I should probably worry about having this baby and concentrating on that but I'll still be planning the next project (as always)!

Saturday, 23 February 2013

Ewan's Shack Bedroom 'Do Over"

As promised, here is a look at Ewan's shack bedroom "makeover". It was ok before and a lot of the stuff in the room is the same but it's been rearranged with a few things added. I must admit I wasn't really happy with it before but now it feels a lot more comfortable and 'loungie", so much so that I'd personally be quite happy to hang in it all day long!

Last weekend when I had the sewing frenzy, I bought some new material and one of the things I made was a bunting flag. The colours were similar to what I already had started with in his room (green, blue and white) but I added a bit of red to warm it up a little.


Yes there are more "trees" on the wall just like his room in the city but I had purchased a set of 6, had only used one and I really like them so I added two more in the shack bedroom. Despite this, I don't think the room is at all similar to his city bedroom so it still works quite well. I added a few wooden birdies who sit on the branches which I think looks cool.


With some left over fabric and some cheap canvas's from Kmart (3 for $5), I made some little art works for above his bed. Because the material is also in the bunting flag, it ties the pictures in quite well.


Roge "acquired" some wooden pallets from Officeworks and we made a little day bed out of a spare single matteress. The "granny rug" was made by an old lady in George town (and a bargain at $40 new) and all the cushions were already ones I had in the cupboard. The book holders are a cheap storage basket from Bunnings hardware for $5.70 each. I love them and Ewan has easy access to his books when he's sitting on his daybed chilling out.


I still haven't done up the old wardrobe but it still works quite well in this space because it's a bit rough. I hung some cheap hooks and the chair was from the Hobart tip shop. The sheepskin rug makes it soooo comfy to sit on!


So there you have it, one very comfortable toddler bedroom. As per my usual style, it didn't take much money to create, just a few second hand bits n pieces plus a bit of creativity.

For a flash back at how it looked before, there is a link here. I'm sure you'll agree, it looks a lot better now.

Thursday, 21 February 2013

A Tee-pee For Ewan's Shack Bedroom

Last weekend I had the most productive sewing day I've had in, like, FOREVER. Roge kept an eye on Ewan for the afternoon and I was sewing like a woman possessed!


I did stacks of stuff, one being a Tee-pee cubby that I made for Ewan. It was one of many new additions that I wanted to make for his bedroom at the shack after discovering Pinterest and getting all inspired.

These are the official instructions that I followed. I purchased the pattern/instructions off ebay but you get enlarge my photo and use them for free!


Roughly translated, here is what they say: buy 2.75 metres of material (if you want to use patterned material you will need double unless you're happy with some of your panels being upside down). Cut the material into two, each being 1.37m high by whatever width your material comes in.

Fold the material in from top and bottom like shown in the pic below.


Then cut along the fold, trying to keep it as straight as possible. I found putting a heavy object on the material to hold it in place (like Roge's big level) helped.


Do this each side of the material and you will then have three pieces as shown in the pic below.


Do the same on your second piece of material. Hem it all at this point (I didn't bother as I overlocked it instead), then sew it all together (but stop stitching about 5 inches from the top as you will need that space to thread poles through). Don't forget to leave an opening for your Tee-pee (only sew that panel half way down). You will end up with a product that looks like this:


Follow step 6 to create a channel to thread your poles through, remembering to stop sewing about 5 inches from the top of the Tee Pee because if you go any higher, you won't be able to fit all the poles through.

I used a few pieces of bamboo that I had laying around for the poles (actually the bamboo was from the outdoor screen which we put up when we did the shack deck renovation). To hold it all up, I used a piece of sisal rope and wrapped it around and around the material where it popped out of the Tee Pee.


Lots of cushions and blankets and viola, a lovely little cubby for my Ewie!


This was a really easy project to put together (especially because I used a plain piece of material, I think if I had have used a patterned one it would have make it a lot harder). I must admit the instructions are a bit flawed (maybe just a bit simple) but it still worked out quite well. Ewan LOVES it and first thing he did was take a book in there and I got half an hour of quiet! I've pegged the opening back but of course you could let it hang, whatever floats your boat really.

So the Tee-pee is just one of the many changes I've made to Ewan's shack bedroom. Stay tuned for my next blog which will show you what else I've been up to...

Monday, 21 January 2013

Gearing Up For A Sunny Season - Part 2

Stage one of the beach shack front facade reno is now complete and I'm really excited about how it's come up. Here's a lovely before shot (gross):


And here is what we've been doing the last few weekends:


I had total renovators block to start with. I was incredibly indecisive and originally was going to use stainless steel cable around the balustrade but decided against it at the last minute. Mainly because although we do have a small view, we required privacy more than anything. Anyone who drove or walked past the house could see us as clear as day sitting on the couch in our lounge room. Sometimes I'm an exhibitionist but when I'm in my trackie dacks and not brushed my hair, it isn't a time that I'm interested in the neighbourhood seeing me!

So in the end we set about doing everything one step at a time. Roge put up the pergola in treated pine, then we put on Tas Oak decking slats for the balustrade and lastly we painted the brickwork a matching grey to the rest of the house (a Dulux colour that I can't remember the name of right at this moment). We are now going to put a bit of bamboo screening up where I plan on making an outdoor shower and planting some kangaroo paws. I also want to find a good daybed, I've been keeping my eyes peeled on Gumtree for something suitable.

So, the budget...we'll I ended up spending a lot more than I thought I would but I still think it was worth it:

Paint (whole of the house) $170 - From Wattyl
Shade Sail $50 - Second hand from Gumtree
Pergola timber, screws, brackets, nails etc - $649.43 - from Bunnings and Becks Hardware
Tss Oak decking $324.95 - Becks Hardware
Bamboo screening $49.94 - Bunnings Hardware
GRAND TOTAL: $1244.32

The next few things we plan on doing out the front, including some paving, will not cost much as we have the materials already and I plan on doing budget savvy things like dividing up the existing kangaroo paw plants I have at our house to use in the shack garden.


Ahh, what a change to this once useless concrete deck. It now has privacy, Ewan won't hurt himself falling over the edge and it feels like we've added a whole new room to the shack. Yay, I can't wait to sit out there this coming weekend with a fruit punch in a wine glass!

Friday, 11 January 2013

Gearing Up For A Sunny Season - Part 1

Out the front of the beach shack, there is a high concrete deck. It's totally unsafe for a 18 month old who constantly threatens to tumble off the edge so we've been living this Summer with the sliding doors constantly closed. The deck area has been totally under utilised so Roge and I have brainstormed and come up with an inexpensive solution that will allow us to use the space as a bit of an extension to the living area.

First however, there has been some prep work required. I picked up a really good quality shade sail off Gumtree the local free online classifieds for $50. It is in perfect condition except that it is filthy. Easy fixed, a bit of sugar soap, a bucket of warm water and a scrubbing brush later and it's as good as new:


All up it took me about half an hour to clean it up but the results are well worth it. I have a HUGE, good quality shade sail to put up on the new "renovated deck area".


Meanwhile, my hard working husband was changing the colour of the shack from baby poo brown...


...to a much more "beachy" light grey. The idea was to paint the house first, before building anything on the deck as that would make the painting easier. The previous owners had spent money on having the place professionally painted just before they put it on the market. However, I think they were colour blind because the colours are atrocious. Baby poo brown with a olive green around the windows and facia. Then a totally different tone of brown on the brick work...yuck!

The grey goes a lot better with the olive green although we intend on re painting the brick work in a darker grey. The long term plan is to eventually get rid of the olive green too and introduce white on the facia and windows but we'll wait a few years to do that (too many other jobs we want to do first!)


The plan is now to put up a pergola and balustrade so we can hang the shade sail and keep Ewan from falling over the edge of the deck. This time next week I'll have the final result to show you and I can't wait....

Cost so far: $170 ($120 for 10L paint and $50 second hand shade sail)

Monday, 3 December 2012

A Completed Beach Shack Bathroom

A few weeks ago, Roge helped me paint a new coat of white paint on the Beach Shack bathroom walls and put down the last of the seagrass matting. That took a day and then the next morning I was able to hang the recycled mirror, another hanging plant (I love them!), the medicine cabinet and a new shower curtain. That was all the bathroom needed and it's made it a whole lot fresher than before.


As you can see, the previous owner didn't have a whole lotta taste! You couldn't tell it was a beach shack bathroom, it simply looked like a daggy 70's bathroom.


The recycled mirror or the back wall was off an old chest of drawers that the previous owner had left at the property. We didn't like the drawers but I knew that the mirror would look lovely if it was hanging on the wall and bonus, I didn't have to pay for an expensive mirror.

We kept the long towel rail that runs almost the whole length of the bathroom as it was practical to keep for hanging lots of beach towels up to dry. The electrician replaced the old fluro light to a cheap Bunnings Hardware spotlight which is a much nicer light when you're trying to put on your make up in the morning, no one looks good in fluro!


I had incredible trouble taking this next photo of the sink area so I apologise for the darkness (hey, I don't claim to be a great camera woman!) We kept all the original sink/shower etc as it was in perfectly good condition, it was all white and let's face it, it's a shack not a day spa! We did however instal a new toilet that had a half flush to save water and new taps which modernised the room enough without having to do a major reno.

The accessories were a combo of things I already had and a few extras. The bamboo tissue holder is from Spotlight ($10), the glass jar was second hand ($2) which I'm filling with shells as I find them on the beach. The hanging plant holder was a hand me down from my mother in law but the bright yellow plant pot is from Bunnings Hardware ($16). Towels were some I already had. The medicine cabinet is from Spotlight and only cost $25 which is a bargain as I spent $110 on the red one that I have in my main home. To see the one I'm talking about click here.


An old apple box is acting as a good loo paper holder and a scented candle does the trick to keep the smells in order if required!


The toilet roll holder was already on the wall and I love it! So 70's (in a good way). I gave it a bit of a polish before putting it back on the wall after the painting.


So there you have it, a completed beach shack bathroom. It's simple and we used a lot of what we had but I'm really pleased with how it's come up. So much nicer than before, that's the main thing and now it looks like a bathroom that belongs to a beach shack.

Wednesday, 31 October 2012

Sunshine, Markets and a bit of Gardening

Not much happens at our place that's worth talking about when the weather is good. This past weekend, the weather was awesome at the beach shack and consequently, we did a lot of hanging at the beach.

Roge played on his new skim-board, Ewan finally put his feet into the water without screaming and Tina the dog, frolicked blissfully in the ocean. And me....well I observed all this from my beach towel, feeling like the luckiest person in the world. Ahhh, the bliss!


On Sunday I went to the Evandale market for the first time since winter ended. There were so many stalls and I had an awesome time picking through everyone's junk (and found a few beaut things) but I was mainly there for one thing, some new plants for the garden beds I'd made at the shack out of the old water tank. For a reminder you can see it here.


I like the look of mass planting of one type of plant over a mis mash of lots of different ones. I think it gives a far better effect. I bought a plant called Silver bush (not sure of it's real name) but it is a coastal, drought tolerant plant which I have had before and I know is reasonably hardy/self sufficient.

The reason I went to the Evandale market to purchase the plants is simply because I know I can get them a lot cheaper than if I went to a garden centre. I bought these plants for $3 each tube as they were a bit pot bound (they really needed to be planted asap as they had grown to big for their pots) but even the nursery quality pots are only $4 each which is about a 50% saving on going to a garden centre and buying the same thing.


So my little plants are all in their new homes now and hopefully will grow and thicken up over the next few months. Soon I hope that these garden beds will be overflowing with silver foliage and white bell shaped flowers. I think they're going to look awesome.

If you're planning on putting in a new garden at your place, I'd highly recommend checking your local market first to see if you can get your plants cheaper. At my local Evandale market, there are several regular stall holders who sell at wholesale price and have a good selection of plants that grow well locally. Any money saved is a good thing hey!