Showing posts with label Tips to save you money. Show all posts

Saturday, 23 April 2016

Autumn Days - Tinkering

It's my turn to get up early with the kids and whilst on one hand it would be nice to be in my warm bed, if I was, I'd miss this glorious dewey Launceston break of dawn. Sigh. It's the simple things. I have to say life is pretty good at the mo.


Life has calmed down considerably this year for us and I'm LOVING it. No huge renos, just little tinkering kinda jobs and spending lots of time hanging out. I'm able to do more of the little things that "make a house a home". Yesterday's project was to pot a cutting of Mothers In Law Tongue plant that I stole/acquired from my Nan's big plant and put it into a lovely pot that she gifted me.


I had an old black plastic pot in the garden shed which I've used as the inner pot because the clay one doesn't have any drainage holes in it and I didn't want to risk breaking it by drilling some in.


Neck-minute, I have another indoor plant to add to my ever growing collection. A cutting like this will take off, thicken and become huge in no time. That's a savings of $20 for the plant and who knows what for the hand made pot.

Anyhoo, have a good weekend everyone. I'm off to make breakfast for the hungry hoards.

Sunday, 3 April 2016

New Garden and Newfound Muscles

Wow, the feng shui is at the top of the dial for me at the mo. I've been a bit quiet on the blog of late because I've been having a few weeks of "getting it done". Some serious finishing of lots of jobs have been happening around here. New gardens created, lots and lots of painting, waterproofing and cleaning/tidying.

A few weeks back when my hubby went to a weekend conference, I was playing out the front with the kids when I decided impromptu to dig up the lawn and create a new flower garden (as you do!)

The front of our house, behind the big wooden fence is one of the last areas that hasn't had a makeover. It's been a bit of a dumping ground, has needed new fences and was the route for all the diggers etc that we've needed to access the all the renos around the back so it never made sense to do much until all that was over. So, now that all the renos are finished around the back, I figured it was as good a time as any to make the front a little more pretty.


I have a small strip of established green at the side of the driveway that needed a bit of sorting and plants divided so once I'd prepared digging the lawn, I took cuttings from my existing garden to put in my new garden. Why not, it's free to do it this way and I love continuity so it made sense to extend the existing garden using similar/the same types of plants.


It took a bit of hard yakka but over a weekend doing an hour here and there, I managed to put it all together. Because I used cuttings from my existing garden, I only had to buy mulch and a piece of pine to make the garden edge. 


The front yard is where the boys have their outside toys set up so it is a lot tidier and safer for them to play now. I'm super happy with how it's turned out. Yes, a bit bare at the moment but once those cuttings establish, it will look lovely.


Apart from the odd little job, most sites of my house are now basically "done" (I use that word loosely cos I'll always find a new project to do). But let just say, if I had to pack up and leave tomorrow, I could feel satisfied that it doesn't look like a building site any more. Hurrah!

Wednesday, 2 March 2016

Decorating Doesn't Have To Cost The Earth

Recently, after I received a sweet comment from a reader of the blog that said "you have a lovely home" I was thinking about that afterwards and felt a little bit self conscious amongst the pride (funnily enough). I thought that it might be a great time to remind everyone that you don't need to spend loads of cash to have nice things.

So much of my house is home made, up cycled, second hand or a hand me down and I wanted to give some examples of that.

Firstly a bit of the history given that not everyone will know my story. My house was an old retro dwelling that had never been renovated. It had shag-pile carpet, gaudy wallpaper and hideous retro features everywhere. The 60's were certainly not subtle in many ways, let alone the house styles! That said, the era also has many endearing features and I think the key is to keep the good bits that keep the house's soul but introduce the modern too (because lets face it, a house needs to be practical).


My style is defiantly to "strip" a house back to the basics. I love white walls, floorboards, neutral colours and lots of texture. It doesn't date as quickly that way and it means your decoration style can be the feature of the house.

In my lounge room I have kept the original fireplace but have put in a modern wood heater. I got rid of the heavy drapes and shag pile in exchange for polished floors and blinds which gives the space a much roomier, simple feel. Once the major stuff was done, it was down to the decorating. Given that I have small kids, having "stuff" only means they break it or it gets thrown around so I don't put a lot out on display. I use lots of house plants (most of which I've grown from a cutting or were left behind by the previous owner.)


I love my entrance to my house yet it's quite simple. I kept the original front door (again, keeping the odd retro feature) but teamed it with new dark tiles, a cheap kmart front door mat and a plant that my mother in law gifted to me.

Where are all the shoes you ask? They're in the cupboard in the hallway. I'm a big believer in cupboards, they hide all the crap away!


Most of my decoration stuff actually comes from the op shop or the tip shop. For example, most of the pots that I have my indoor plants in are from the oppie, as are the dishes and plates that I sit them on. This old swan vase (Betty) was again a second hand score and fits in my retro house like it lived there all along!


I don't have the money to buy expensive art so I often buy second hand art from the op shop which I take out of it's crappy frames and modernise by putting it in simple black frames. This Christine Ellis original art work was found at the Vinnie's store in Invermay and I love it. Cost me a few dollars, the frame about $10 and when I looked online, it turns out it would be worth a few hundred dollars. Score! I've framed tea towels, friends drawings, photos and none of it costs the earth.


I love amber coloured glass which is good because I often find old retro glassware, plates, light fittings etc at the tip shop. Each item only costs a few dollars at the most.


All my chopping boards are home made by my hubby out of scraps of timber. It doesn't take long to cut them into a sharp and sand them. The marble tile I found at the tip shop for a whole $2! It really is a case of luck of the draw on the day. I must admit I'm a bit addicted to that feeling of finding something really cool that I can give a new life.


Lots of my furniture like the sideboards and drawers are all from the tip shop or Gumtree. I give them a bit of a sand and an oil and they're like new. I think the key is to not go too overboard and have EVERYTHING old/retro. Mixed with a bit of modern stuff, they look quite good.


I think I've mentioned this one before but I often buy more expensive designer pillowcases and team them up with a cheaper doona cover or blanket that I might already have. Saves spending hundreds of dollars on a whole new "set" and satisfies my desire to have the latest linen that I'm seeing in the homewares magazines.


Throw a bit of Kmart new stuff in the mix and go through your cupboards to rotate what you already might have and neck-minute, your house looks pretty and you haven't spent your life savings achieving it.

I hope everyone is having a great week so far.

Alex

Sunday, 28 February 2016

A Weekend In The Garden - Mulch Making

This weekend I've been hanging in the veggie patch. It was time for a good clean up, things had got way out of control and I could barely walk along the paths, they were so overrun by pumpkins!


One thing I've learnt in recent years is that mulching the old plants is super nutritious for your garden soil. However when it's still big (not broken up) it doesn't break down as quickly so I came up with a clever little trick that didn't require me to buy a mulcher (have you seen how expensive they are??!!)

Put the catcher on the mower, lay the old plants out and mow away!


Neck minute, mulch! You can sprinkle it on top of your garden beds, add it to your compost pile or make trenches in your garden beds and bury it. Either way, the worms will love it and it will break down quickly, feeding your soil.


Note: don't do this with your weeds, just the old veggie plants. The weeds need to go into the bin.

I have a delivery of pea straw coming this afternoon which I'll start laying over the beds that are going to be empty until spring. Unlike every other year, I'm going to be super organised and not leave my mulching until the last minute. My garden next year is going to be a super oasis of productivity, lol!

Ahh, I love a good weekend spent in the garden. I put on the radio, lather the kids in sunscreen and we go and get dirty. It's good for the soul!

I hope your weekend has been a good one too.

Alex

Saturday, 11 July 2015

Saving The Environment One Plastic Bag At A Time!

Happy weekend y'all! If you're in Australia, I hope you have some indoor activities planned because it looks like a cold front is on it's way...

I have a reasonably uneventful weekend planned so I'm going to continue with my latest activity, to eliminate as much plastic in our life as possible. Why? The simple answer is, because we don't know what plastic is doing to our bodies AND our environment is too important to be contaminating it with plastic that doesn't degrade.

How am I going to do this do you ask, because as you know, most things are plastic or come in plastic wrap. Simply, I'm going to try to avoid plastic where I can (find an alternative).

Last weekend I started in the kitchen which is where our biggest consumption of plastic is. Instead of plastic enviro bags I'm switching to jute which are 100% biodegradable (and they look heaps prettier!)


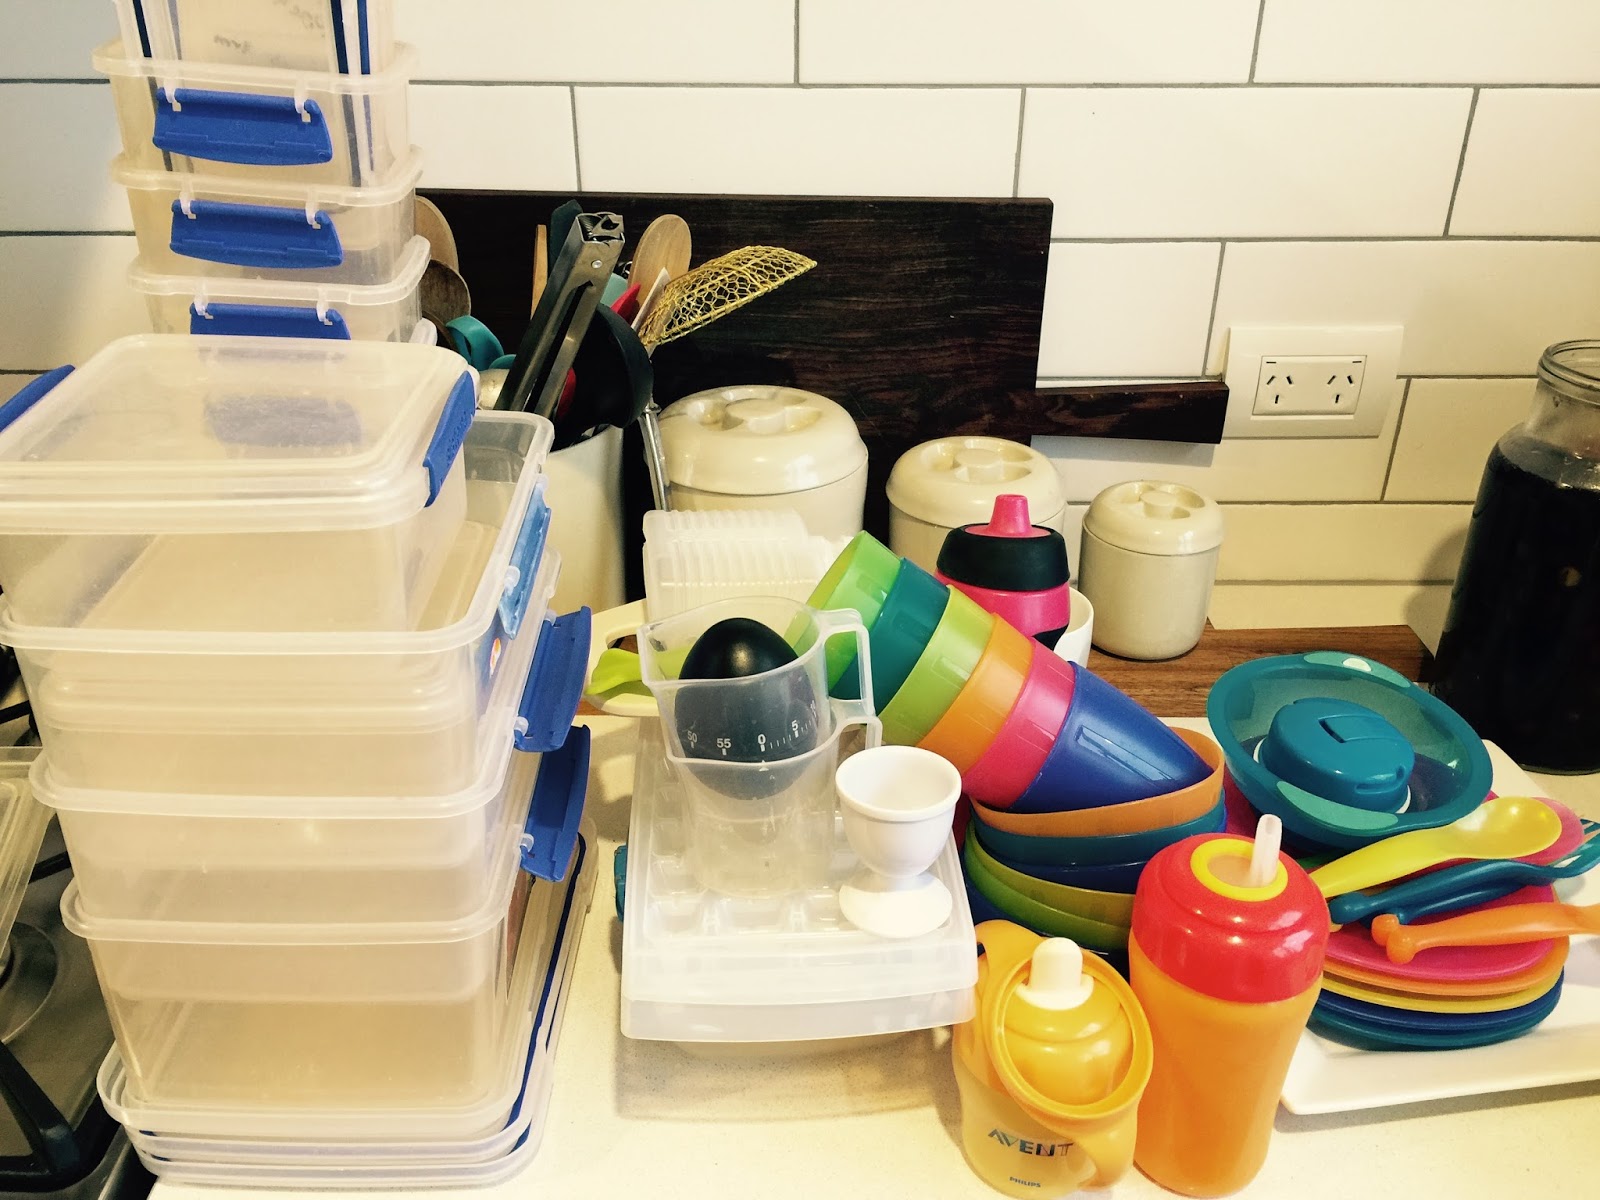
All the plastic containers, jugs, and bowls (bar a few) got replaced with glass and stainless steel. Actually, I didn't even have to replace as much as I got rid of. I used to have a whole drawer dedicated to the kids plastic bowls, cups, forks, lunch boxes etc. I've simply got rid of the lot and now the kids use the same bowls, forks etc that we do. Simple (and I've got a whole drawer back to use for other stuff).


Pyrex (and even Kmart) have glass containers which have only plastic lids. Much better for heating up foods in the microwave. For fridge storage, I'm using these (above), ring lock jars (also from Kmart) which have no plastic other than a rubber seal or I keep the food left overs in a ceramic bowl or plate with a bit of aluminium foil (or another plate) over top.

For cakes and biscuits, I've gone back to my good ol cake tins (you know, the ones your Nanna always used). For kids lunches, I haven't yet found that I've completely got rid of the plastic but I have got rid of 50% of it. A stainless steel water bottle and paper bags/cloth lunch wrap if I send sandwiches or muffins. Yoghurt still goes in a plastic container, mainly because the daycare have a no glass policy.

Toothbrushes are now bamboo (100% biodegradable). Did you know that Australia puts 30 million plastic toothbrushes into landfill every year. Crazy!


I'm going to reduce the amount of fruit and veg that I freeze every year by preserving them into Fowlers jars instead. This is because I have to freeze everything in plastic. There's two bonuses to changing this way that I preserve, the first is that I'm not using as much plastic and the second is that I should be able to get rid of the second freezer, hence saving myself money by running it. I've already been increasing my Fowlers jar collection after buying a stack more from the local op shop this week.

I've also put a no junkmail sign on the letterbox. It was long overdue, I was getting millions of catalogues every week and I'm not much of a shopper so it was too much waste to bare.

And the last thing I've been doing is changing my shopping habits. I've been taking my own glass containers to the butcher and fishmonger who puts the food straight into that instead of into plastic bags. I've also been buying more unpackaged products from the bulk store/health food shop and again, taking my own containers/drawer string bags or using their paper bags (which I can put in the compost once I'm done). I even took my own jars to purchase honey and tahini from the bulk store by filling the jar from their big vat. That's two less containers that needs to be manufactured. Whoop!

The feng shui is amazing. I'm gaining more storage space back in my kitchen cupboards because I'm simplifying. Yes I need to be a little more organised but that's not a biggie (just another routine to add to the other million I have as a mother!)

Anyhoo, the kids will be home in a sec from their hair cut so I'll wrap this up. Have a good weekend and maybe think about how you can cut down your plastic consumption. I'll put some links below of products I've been using that can be purchased online. Have a fun weekend!

Toilet paper: http://au.whogivesacrap.org
Toothbrushes: http://www.floraandfauna.com.au
Shoes: http://www.toms.com/australia
Jute shopping bags: http://www.bangconsortium.com
Pyrex Australia: http://www.pyrexware.com

Friday, 5 June 2015

Launceston Has A New "Tip Shop" - Uptipity

At the end of 2014 Launceston opened it's new "tip shop" at the local refuse centre, aptly called Uptipity. This was very exciting for me, I'm quite a fan of others "trash".


I have frequented the shop and every time, left with an armful of loot. New yoghurt thermos's, bread makers, puzzles and toys for the kids, books, furniture, golf putters to name a few things. The most exciting however was something I found only last week, a dirty slab of marble which was hidden amongst the gardening supplies out the back.


Goodness knows what it was originally, I couldn't work it out. It had a brass attachment glued on the back but it was as if it was broken. Maybe it was a table or a seat, either way, I instantly knew what I would do with it. Oh and did I mention that it cost me $2? Bargain!

I chipped off the brass bit, gave it a good scrub and attached some felt furniture protectors to the bottom and voila, I have a new, very stunning serving board.


I saw something half this size in a homewares store shortly afterwards for over $60 so I was pretty happy with my bargain up-cycled serving board. A win for more reasons than one.

So, I'd recommend going and finding yourself some treasure amongst the trash. Uptipity is located at the Launceston City Council refuse site on Remount Rd, Mowbray.

Sunday, 17 May 2015

Pretty New Things

I'm a lot more particular about what I buy now days, most things are carefully considered before being purchased. Mainly because we don't have money growing on a backyard tree but also because I don't want unnecessary clutter in my house.

My mother in law gave me a lot of her old macrame hangers which over time, I've found new homes for all over my house. This is my latest one which is now hanging in the hallway of our retro house. I love these plants but I've forgotten what they're called. It's fairly common tho and it will cascade nicely from the pot the more it grows. It cost $10 from Kmart.


Next I've purchased some gorgeous mustard coloured pillow covers from Kip n Co ($59 for the pair). I rarely buy new quilts, unlike the me of the past who had a clear penchant for every colour and texture of a new released line of linen. Instead, I've discovered the value of purchasing a more expensive but good quality linen set which will last longer.

This winter, I've gone even more thrifty by only buying a set of new season pillowcases to go with my existing quilts and have found that this alone is all that is needed to update my existing bed sets (which are still going strong) and it costs a fraction of the price. 


So that's my show and tell for the day. As nice as it would be to be able to make purchases with little bother for the cost, I think it's probably more satisfying to make purchases that are considered and restrained. Plus, it's good for my hip pocket and my dislike for clutter.

I hope you're all well. Life here is busy but more about that another day...

Tuesday, 24 March 2015

Produce Scavenger

Lately I've been scavenging fresh produce (no "bin diving" required!) as I've discovered a few resources which have given me access to lots of FREE produce.

Firstly, I discovered an urban map (online) of public access fruit trees in Tasmania which I used to locate myself some very yummy figs in a local park.


Also, on the way to our shack I noticed that along the side of the roads there were various varieties of apple trees. So yesterday I stopped and picked a huge bag (I could have picked trees and trees of them there were so many).

Lastly, via good old Facebook, I've discovered a page called Launceston Fresh Produce Swap. Through that I've been able to swap my own excess produce for other people's excess produce (fruit mainly cos I don't yet have many well producing trees myself). Even when the person offering their produce didn't want anything of mine, we were able to come to the agreement to swap some pantry items for what I wanted of theirs (nashi pears - yum)! If you're not a Launceston local, I'm sure there would be a similar type page in your area if you do a search.

So along with my own veggie patch and the awesome friends-family who have let me raid their gardens, I've barely had to buy fresh produce for months. It feels so good on many levels to be able to grow and eat our own home grown food. I'm still getting baskets like this every day so the freezer is overflowing. I love my urban backyard farm!


I stole this from the Gardening Australia Facebook page. I love it!

Friday, 6 March 2015

Making Home Made Yoghurt (The Updated Version)

This time last year, I shared a post about my home made yoghurt. Since discovering how easy it is to make, I've never looked back BUT I've refined my process (and thought it was time to do an updated post on it).

So, it turns out that you can make yoghurt in just about anything so long as you have a yoghurt starter culture, some milk and a thermos/Eski type container. I use an Easiyo thermos (which you can find dime a dozen at the op shop) but I don't use the plastic jug any more. I've been using a glass Fowlers jar number 31. I feel better about using less plastic items in my life (we all know about the risks of BPA) and since discovering I can use the glass jar (or anything that fits into the thermos for that matter), I have purchased another op-shop easiyo thermos so I can do a double batch at once. Mainly because my family use 2L of yoghurt a week and it's easiest to do it all in one batch. You do not need a Easiyo thermos to achieve the yoghurt though, you simply need a small thermos which can hold hot water.


The recipe:

1 Litre of milk (of your choice, cow, goat, soy etc but not nut - it won't work)
1 Heaped tablespoon of your starter culture (that can be a heaped tablespoon out of a packet of Hansells or Easiyo powdered yoghurt starter or a heaped tablespoon of yoghurt out of your *last batch of yoghurt that you've made.)

1 - Heat milk in a saucepan but don't let it boil. A good sign of this (if you don't have a cooking thermometer) is the point where the milk starts to froth/bubble a bit. You do this to kill off any cultures/bacteria that will compete with the yoghurt cultures (which you don't want to die otherwise the yoghurt won't work). Alternatively, use a long life milk as it has already been heated at high temperature so you can skip this step and the next.
2 - Cool your milk to room temp or colder. I put the heated milk in a jug in the fridge for an hour or two at least.
3 - When your milk is ready add the yoghurt/powdered yoghurt into your jar of choice, making sure all the starter mixes through evenly. Cover your jar with a piece of cling-wrap.
4 - Boil the jug. Fill up the Easi-Yo thermos with boiling water to the recommended point and submerge your jar of yoghurt mix or if you use a small thermos, fill the water so that it comes two thirds up the side of your jar of yoghurt.
5 - Leave the yoghurt mix for minimum 6 hours (I prefer 10-12). When you are ready, remove the yoghurt from the thermos and check that it has worked. You should have lovely creamy yoghurt (and you can make it creamier by adding milk powder into your mix when you add the starter culture to the milk).
6 - At this point you can decide what to do with your yoghurt. Eat as it is or add other flavours. I have been adding equal parts of stewed/pureed fruit and a tsp of vanilla paste to make the most delightful sweet yoghurt.

If you want to make cream cheese:

7 - Get a bowl/jug and a piece of muslin/clean tea towel. Tip your yoghurt into the muslin/tea towel and tie it with a rubber band or piece of string. Suspend the wrapped yoghurt over the bowl/jug (I hang mine off a wooden spoon) so the whey can drain from the yoghurt. Do this at room temperature in a place out of the sun for up to 12 hours (or until you get the consistency of cream cheese that you want.) Do not discard the whey, it is incredibly nutritious and can be added to smoothies or used to ferment vegetables. Store it in a jar in the fridge for up to a month.

If you want to have a look at my original yoghurt making post, the link is here. It's much the same but I have tweaked it since discovering you don't need to use as much starter culture as I first thought.


Yoghurt made from a commercial starter culture like the one I use has 4 different beneficial cultures/bacterias which help with good gut health. Keep an eye out for my post on Milk Kefir which contains between 35-50 good cultures/bacteria and from it you can make coconut yoghurt. The stuff is magic juice for the stomach.

*note. If you use a heaped spoon of your last batch of yoghurt, you may find that you can only do 5-7 batches of yoghurt this way before you need to re start with a commercial starter product. I've recently learnt that this is because the probiotics slowly reduce each batch (I can't remember why) but what you will find is you get a thinner yoghurt the less probiotic it contains and if you're anything like me, I like a thicker yoghurt so I always use a commercial starter every couple batches. It only need to be a heaped tablespoon of a Hansells or Easiyo packet starter and you'll be off again with a renewed probiotic content (and thicker yoghurt).

Monday, 17 November 2014

Home Made Mould Killer

Mould. Gross stuff and no matter how hard I clean my shower, from time to time it rears it's ugly head.

Recently I discovered that clove essential oil is one of the best natural mould killers going around. It's primary ingredient, eugenol kills over 60 strains of bacteria, 15 strains of fungi and several viruses. Armed with this knowledge, I decided to make some "mould killer" which I spray around when some spots appear in the shower, when someone has been sick in the toilet (or on the floor) and even in the kitchen sink. Key is to spray it on and leave it for approx 20+ minutes.

In a 500ml spray bottle you only need 10 drops of clove essential oil to 500ml of water. Easy eh! Give the bottle a little shake before spraying.

Note: this mould killer will kill the bugs HOWEVER, elbow grease is the only thing that is going to get rid of any stains, just keep that in mind. I hate to promote this but I have been known to kill the bugs with my spray and then use a bleach product to remove the mould stain. Not recommended if you want to go all al-ah-natural but good if things have got a bit out of hand and elbow grease hasn't worked.


I looooooove the smell of cloves so I spray this mixture around just for the fun of it as a bit of an air freshener. No harm in doing so, it's all natural.

Friday, 14 November 2014

DIY Christmas Paper and Cards - The Potato Stamp Is Back!

I may be a little bit in love with my home-made potato stamp. I can't stop stamping!!

After making my Advent Calendar, I've started to make Christmas paper and cards with some materials I already had in the cupboard (so adhering to the "No Spend November" rules). I always have brown paper and I still had a packet of these cheap Kmart cards. Both have now been "Christmas-ized".


A few coloured buttons and voila


Whilst I was stamping away, Ewan was doing his own version. I'd cut Christmas tree shapes into sponges and gave him some kiddie paint. He almost had as much fun as me!


Next for the wrapping of the gifts. I might save that for a bit closer to Christmas day but at least now  I have something to wrap with. The versatility of brown paper and a potato eh!

Wednesday, 12 November 2014

No Spend November - Shopping Tip

Today is usually my supermarket shopping day. It's the one day my kids are in day care and I can shop in peace HOWEVER today, I'm not going. Why am I telling you this you're wondering? Well it's because I have something to share with you. You see, I have been doing "No Spend November" for over a week now and lots of you have been sharing your tips to save me money. One of those cracker tips was from a woman called Lori.

She told me that instead of shopping on a 7 day cycle, I should try to stretch my shopping trip by a day (and not spend any more than I usually would). Then in theory, every 7 weeks, I will have skipped equivalent to a week of shopping. Thats a handy $150 in my pocket. What a ripper tip!

So today I'm going to spend some time in the veggie garden instead of doing my usual shopping trip. That sounds much more fun to me any way! Thanks for the tip Lori. X


To "stretch" your ingredients that one extra day without spending more than your usual budget, crafty cooking is going to need to be required. Here are some suggestions of home made meals that are inexpensive and can be made with left overs from the pantry and fridge:

Meals

Fried rice (great for using up the last of the veg in the fridge)
Home made chips and sauce
Pea or carrot frittas
Veggie soup (also good for using the last of the ingredients in the fridge. You can also add pasta, rice or legumes to give it a bit of extra "bulk)
Egg on toast/omelette
Risotto (cos it's basically just rice, stock and a few veggies)
Baked bean toasties (otherwise known as jaffles?)

Snacks

Popcorn (a bag costs less than $2 and makes bucket loads of the stuff. Sooo easy to make too)
Sultanas
Use that last brown banana to make muffins
Cheese and crackers
Frittas (carrot, pea and corn are cheap to make and most of us have these things in fridge/freezer)
Boiled egg
Rice cake with vegemite or honey

Anyhoo, you get the picture. I personally think it's about getting creative. We all have staples in our pantry and a few left overs in the fridge/freezer at the end of each week/fortnight. I know that I (and you) could find a way to stretch out your shopping by a day each week. It's worth a try anyway!